Many paraglider pilots lay out their wing facing directly into wind, and aim to inflate it straight upwards. If it shoots off to one side, they abort the inflation and start again. It looks neat to have your glider come up symmetrically, and many pilots become quite good at it. But I would argue this success is needlessly fragile – one day a random gust of wind will push your glider off to one side as it inflates, and you’re better off knowing how to recover it. Once I started training for this, I found it better for the wing to come up wonky every time. Symmetry is fine for suburban gardens, but it’s overrated for inflating your paraglider.
The advantages of asymmetric inflations are
- Less pull in high winds
- Easier to turn and untwist the risers
- Easier to launch when the wind is off the slope
- Easier to get right – aiming for the exact middle of the wind window is much harder than aiming for one side.
- You can inflate your wing after it crumples on the ground with just one wingtip catching the breeze.
Playfulness before technique
The techniques described in this article will get you started with wonky inflations – but curiosity and playfulness are much more important than trying to follow technical instructions to the letter. Your wing may behave differently. Just keep playing and experimenting within safe boundaries, and remember you learn as much by getting it wrong as by getting it right. I believe playfulness is deeply important in paragliding, without it you’ll struggle to become a competent and well-rounded pilot.
Begin at the end
The best way to start learning asymmetric inflations is with the wing above your head. The wind strength should be enough to give you a decent pull without risk of dragging.
Now pull progressively on one brake so as to bring the wing down to one side. Get a feel for how much brake you need – not too much or you’ll stall the wing, but enough to gradually steer the wing all the way to the side until a wingtip touches the ground. Now try to get it back above your head again. Keep doing these wingtip touches to one side and then the other. When you’re confident, try touching half the wing to the ground and then reinflating. You may need to grab the A line on the upper side to give an extra boost when re-inflating. As a final challenge, try to make ¾ of the wing touch the ground and then get it back above your head.
Some wings are easier than others to inflate asymmetrically. I’ve found that certain EN-A wings are harder than higher rated wings. But don’t let that put you off – if you master this with a tricky wing, you’ll be in a great position for the rest of your flying career. You may also find it easier on an into-wind slope rather than somewhere flat.
If you get this technique right, you’ll find it works well for putting your glider down in strong winds – as an alternative to pulling on the rear risers. Just do a wingtip touch while walking towards and slightly in front of the wing, and then when half the wing is on the ground pull hard on the brake on the inflated side too.
Wonky inflations in action
Asymmetric inflations work well when the wind is off to one side. Just be sure to position your glider so that it will pull you up the slope as you inflate, not along the contours of the slope. Some pilots get used to untwisting one way, and hate doing it the other way. Try not to get stuck in this rut – practice the way you hate until you have no preference. With an asymmetric launch, the pull of the glider untwists you, so you don’t need to worry so much about forgetting which way to turn.
Three levels of wonkiness
There are degrees of asymmetry – a little wonkiness in your inflation is very easy if you’re used to doing it symmetrically – but it won’t reduce the pull of the glider by much. Start slightly wonky and work your way up to a full on “cobra” launch (that’s where one wingtip comes up first, looking a bit like the head of a cobra).
Level 1 – One sided wonky pull-up
Lay your wing out as if for a symmetric inflation. But instead of building a normal wall holding both A risers, just inflate with one A riser. Which one? If untwisting by turning left, you’ll want to pull the A riser connected to your left wingtip, and vice versa. Get this wrong, and you’ll have to do an awkward pirouette, untwisting in one direction while side-stepping to the other.
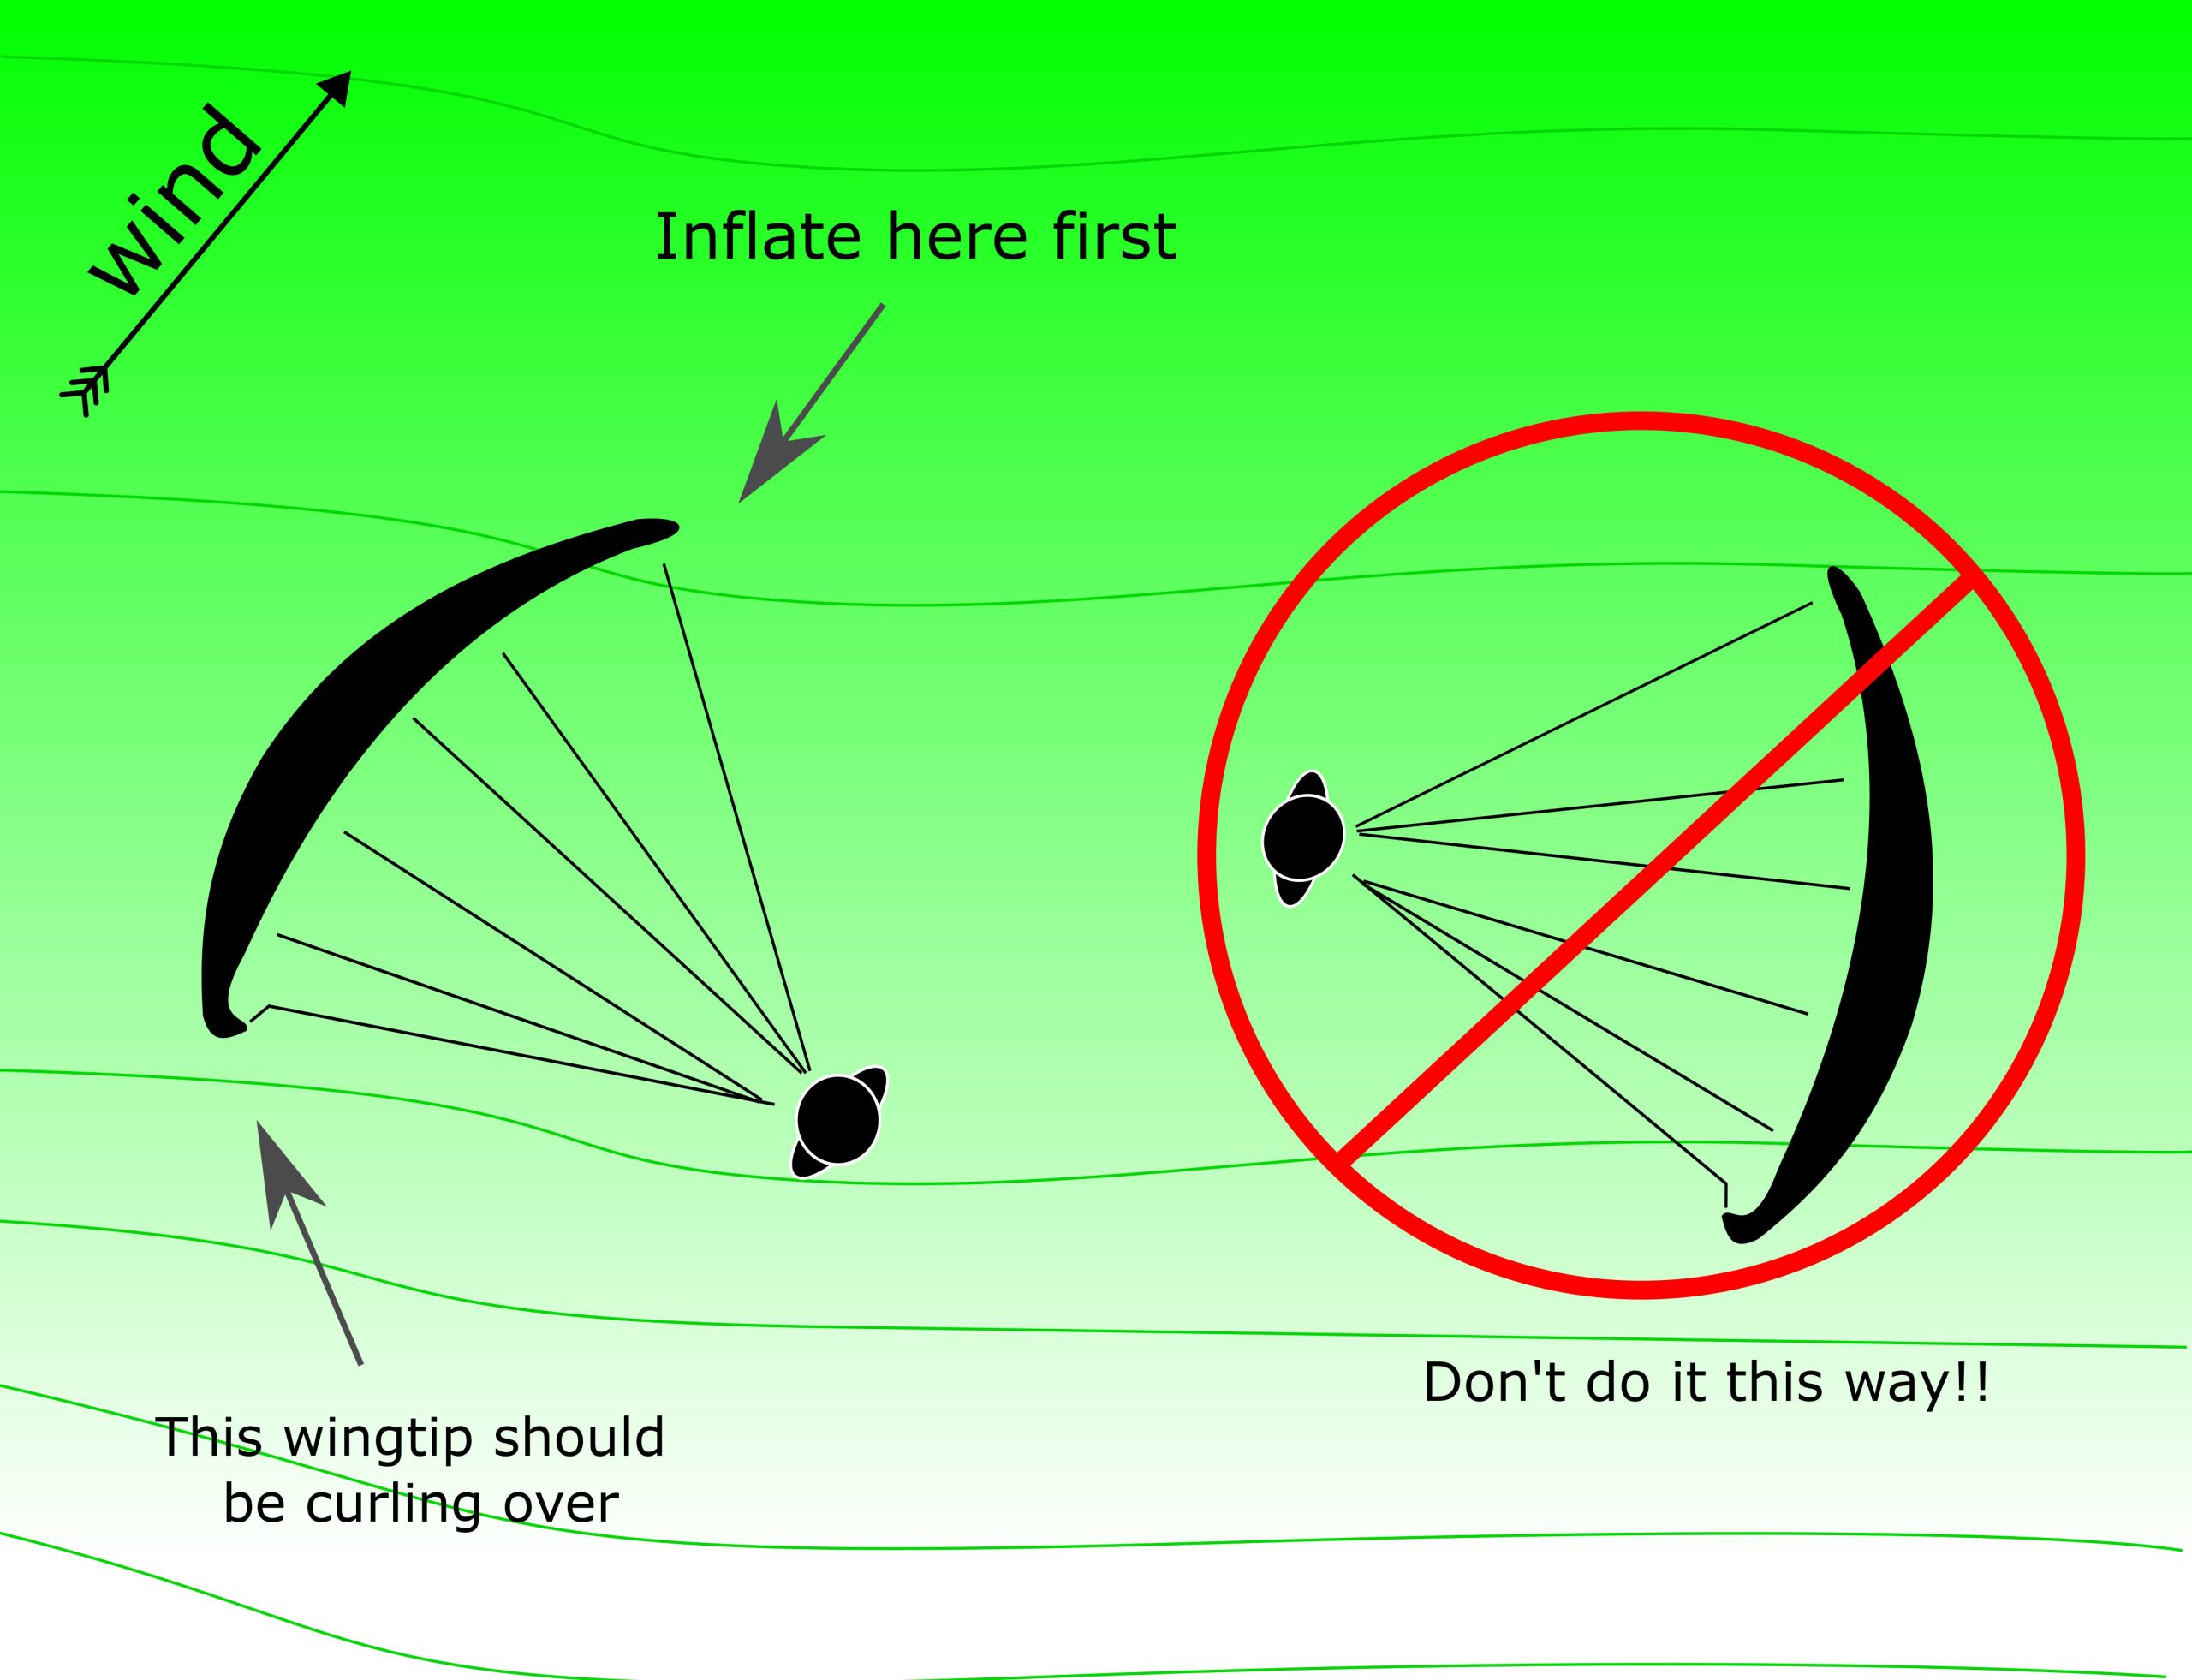
Level 2 – Wonky wall
To crank it up a notch, build a wonky wall. Start with a symmetric wall, then walk around your wing, keeping the downwind wingtip inflated, until the into-wind wingtip just starts to curl over. The highest point of your wonky wall should be the downwind wingtip, that’s the bit you want to inflate first. Then proceed as before. Be sure not to bring it up on the wrong side though, or your glider will inflate straight through the power zone and give you a big pull. Whichever side the wing starts on, it should be flying towards that side as it inflates.
Level 3 – Super wonky (aka cobra)
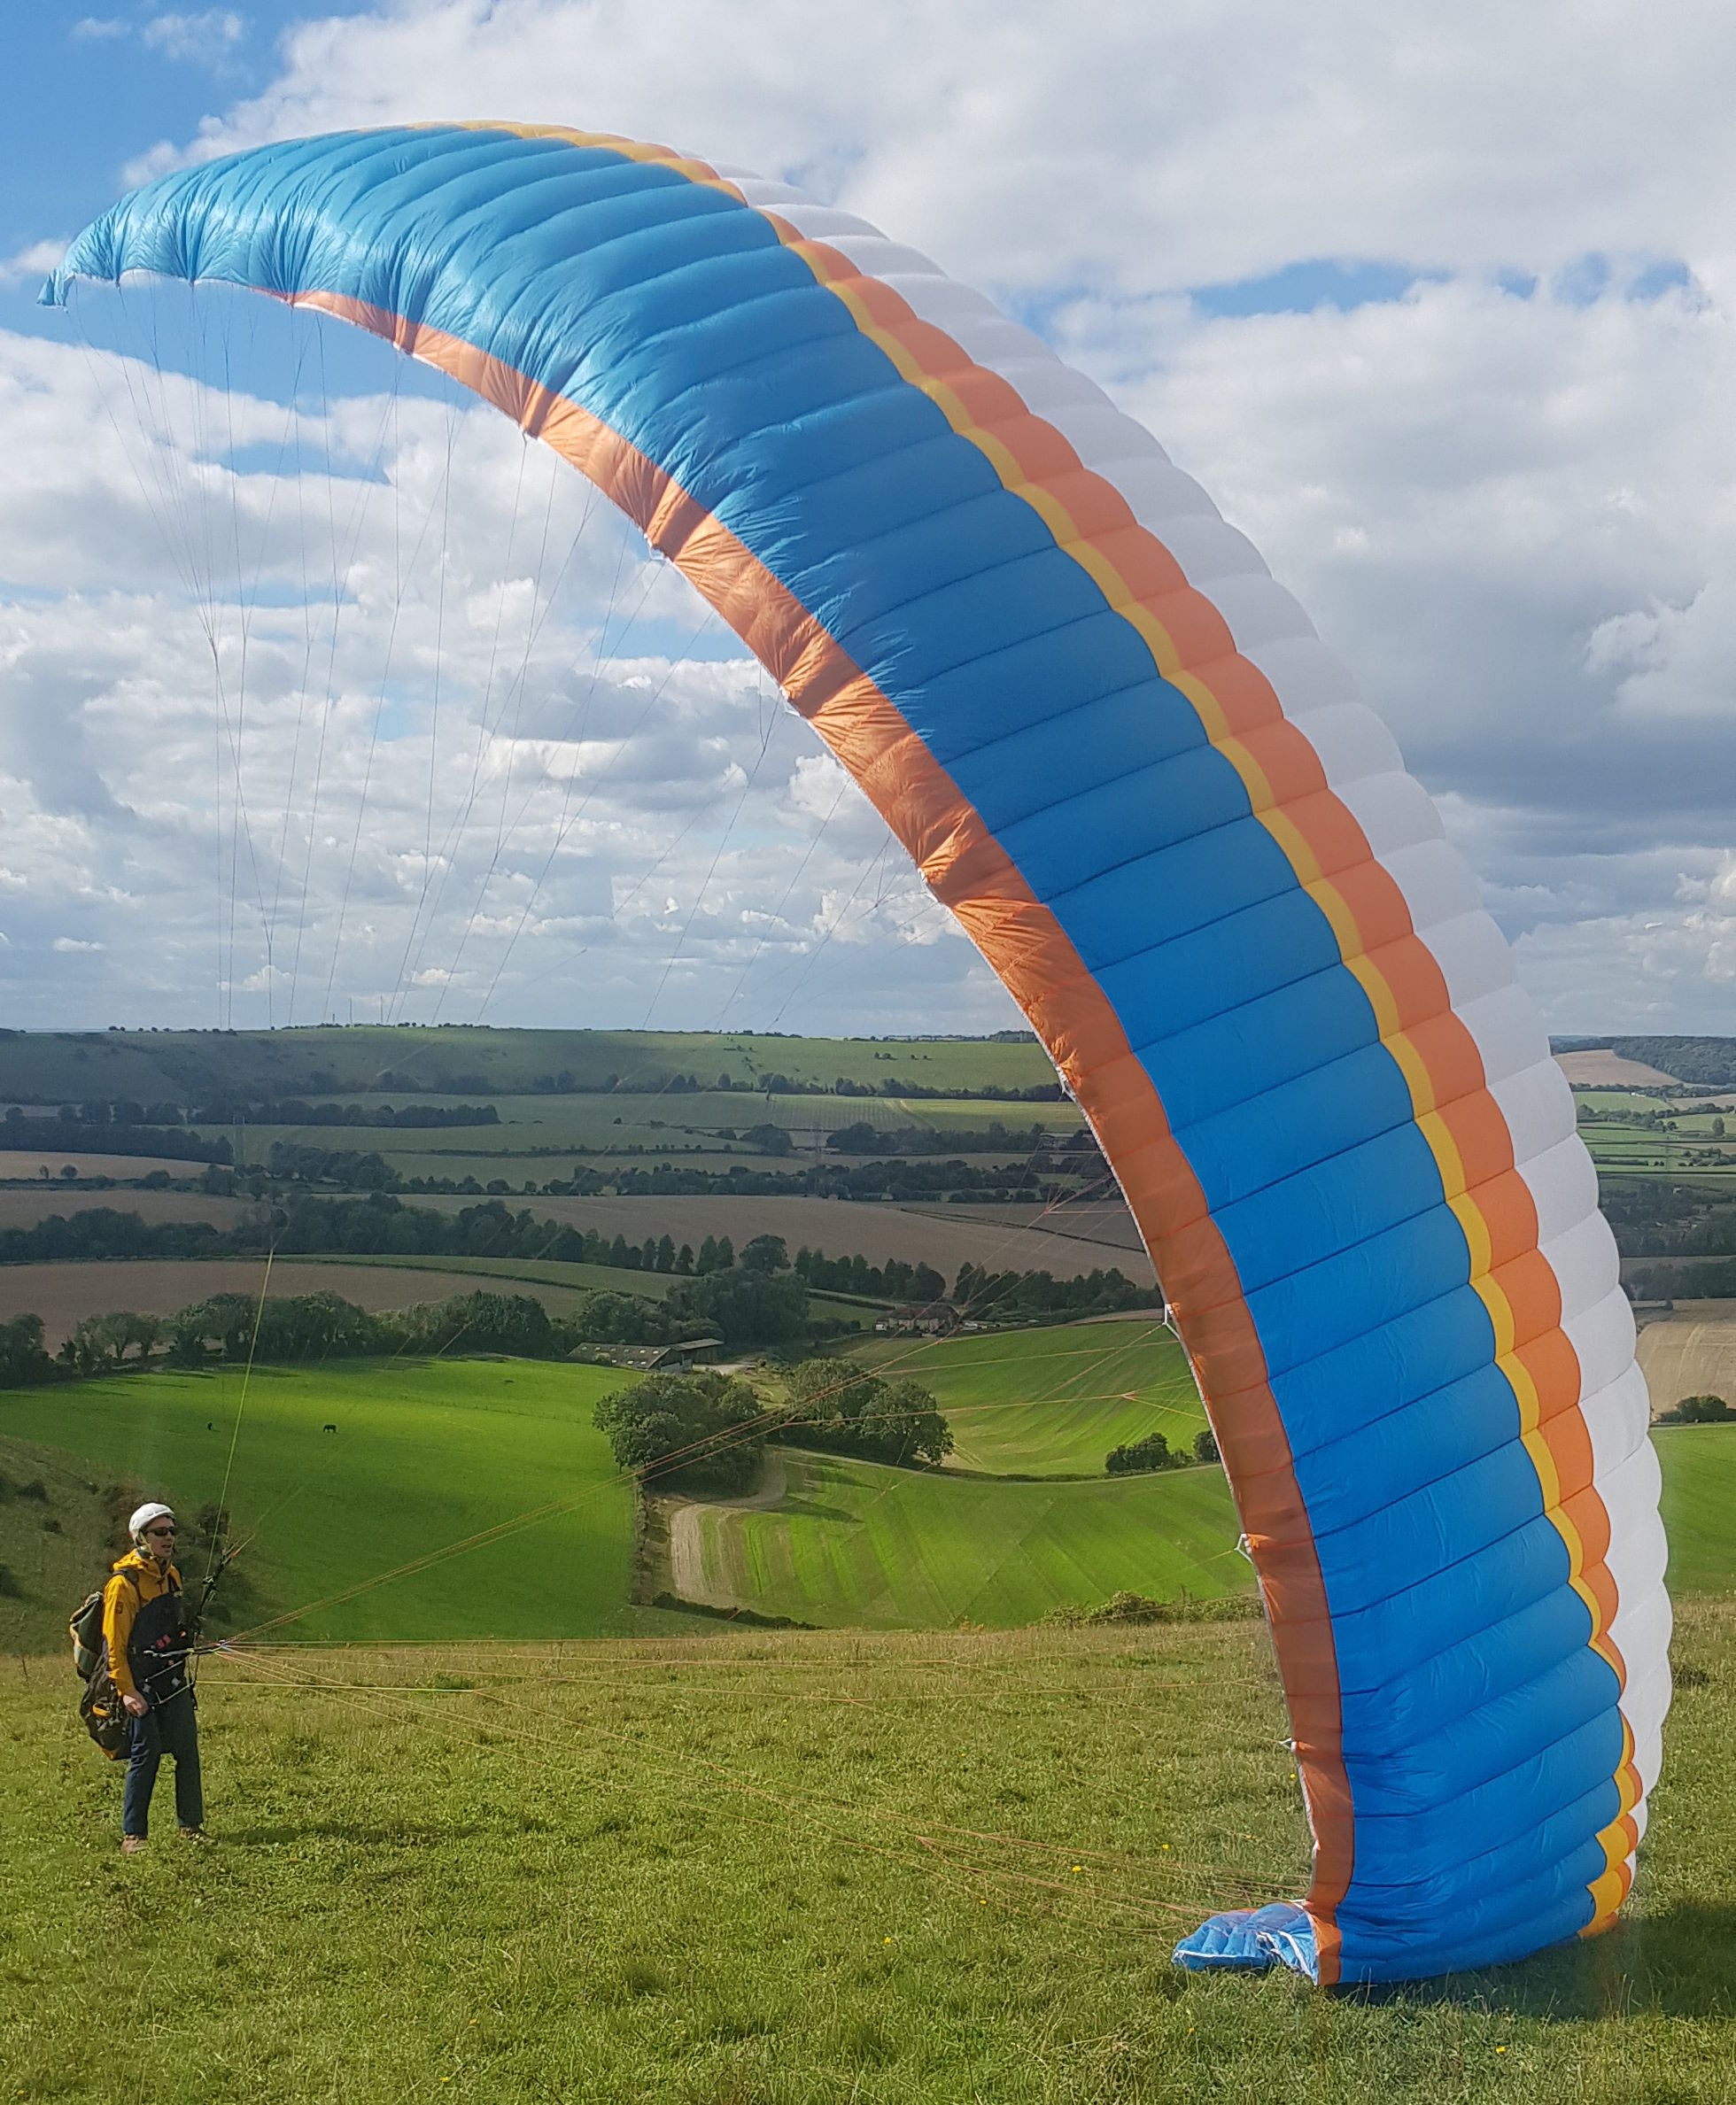
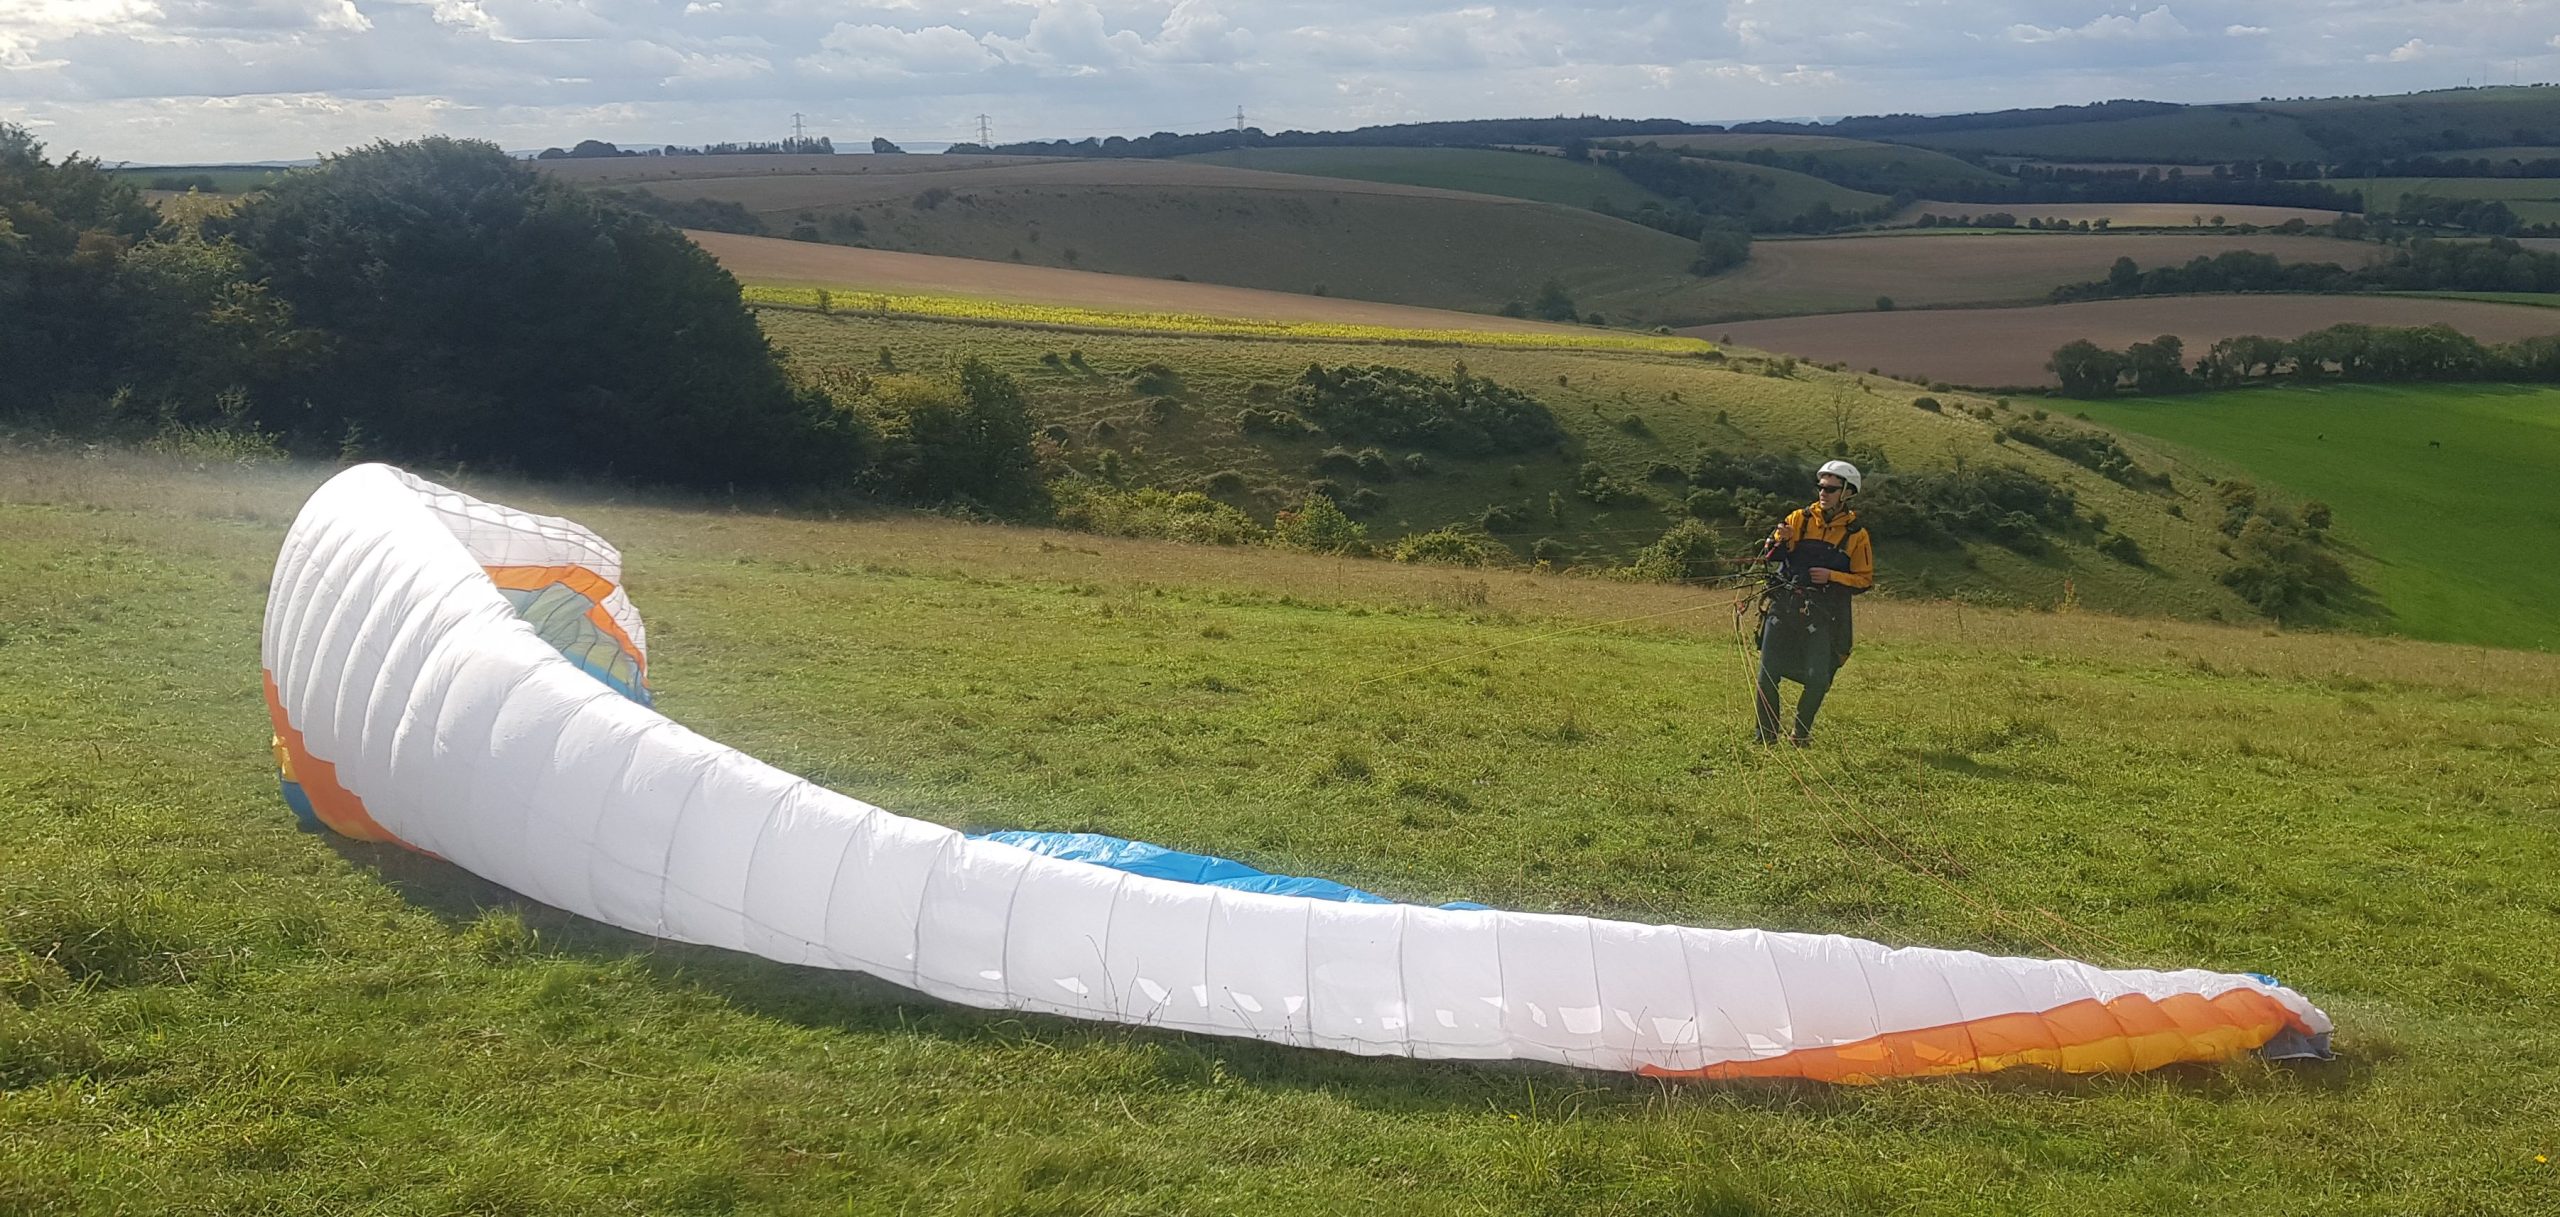
Now for the real deal: instead of starting with a wonky wall, start with one wingtip pointing completely into wind. Your body should be side on to the wind, facing the very wonky glider. Instead of pulling on one A-riser, just pull on the outer A line connected to the downwind wingtip. If the left wingtip is coming up first, you’ll be using your right hand on first the outer A line, and then perhaps on the A when she’s part way up. You want to keep the leading edge at a slight upward angle (see photo). And sometimes it helps to alternate between pulling some brake and then some A riser. The slower you can bring it up, the better – the pull will be dramatically reduced this way.
In strong winds you may find it difficult to keep one wingtip facing into wind when your wing is on the ground – the wingtip will tend to curl over and over. If you ignore this, you risk a cravat or line-over. There are three solutions: have an assistant hold the into wind wingtip (tandem pilots use this technique all the time), start with the wing bunched up (mushroom or concertina) and just the downwind wingtip pulled out, or lay your wing out somewhere where the wind across the ground is reduced (eg. just back from an abrupt shallowing in slope angle).
Photos by Russell Winters